
On the rear triangle of the latest frame, my new super fat rotundcycle, I test-drove the pulser on the ThermalArc 185. I started trying it when I had poor line-of-sight on the elevated chainstay bridge and I thought it’d help with heat control on those tight spots. But after I got done with the bridge I just kept going. I always have done ‘straight amps’ but wanted to see if I could get more consistent looking beads and less heat distortion by using the pulser. Also, I realized on the last few frames that I was foot-pulsing more than normal, mostly in the acute angles – under the downtube, countermiter of downtube/seat tube. I was also finding myself not dabbing the filler road and just laying the wire in there for the high part of the foot pulse to “absorb” into the bead. Laying the wire in there with tension (pushing it in there) also acts to close or block those small miter gaps that you just didn’t feel like filing any longer to get water-tight. So when using the pulser previously I felt like I was losing control but something has clicked in my brain recently. The pulse heats/cools so you should get less ovalization/heat distortion and it also gives more control over how the bead looks aesthetically. I could also lay longer passes and minimize my starts/stops, and my welding isn’t as affected by tired hands and arms which would make me more shaky when using straight amps and dabbing the filler.
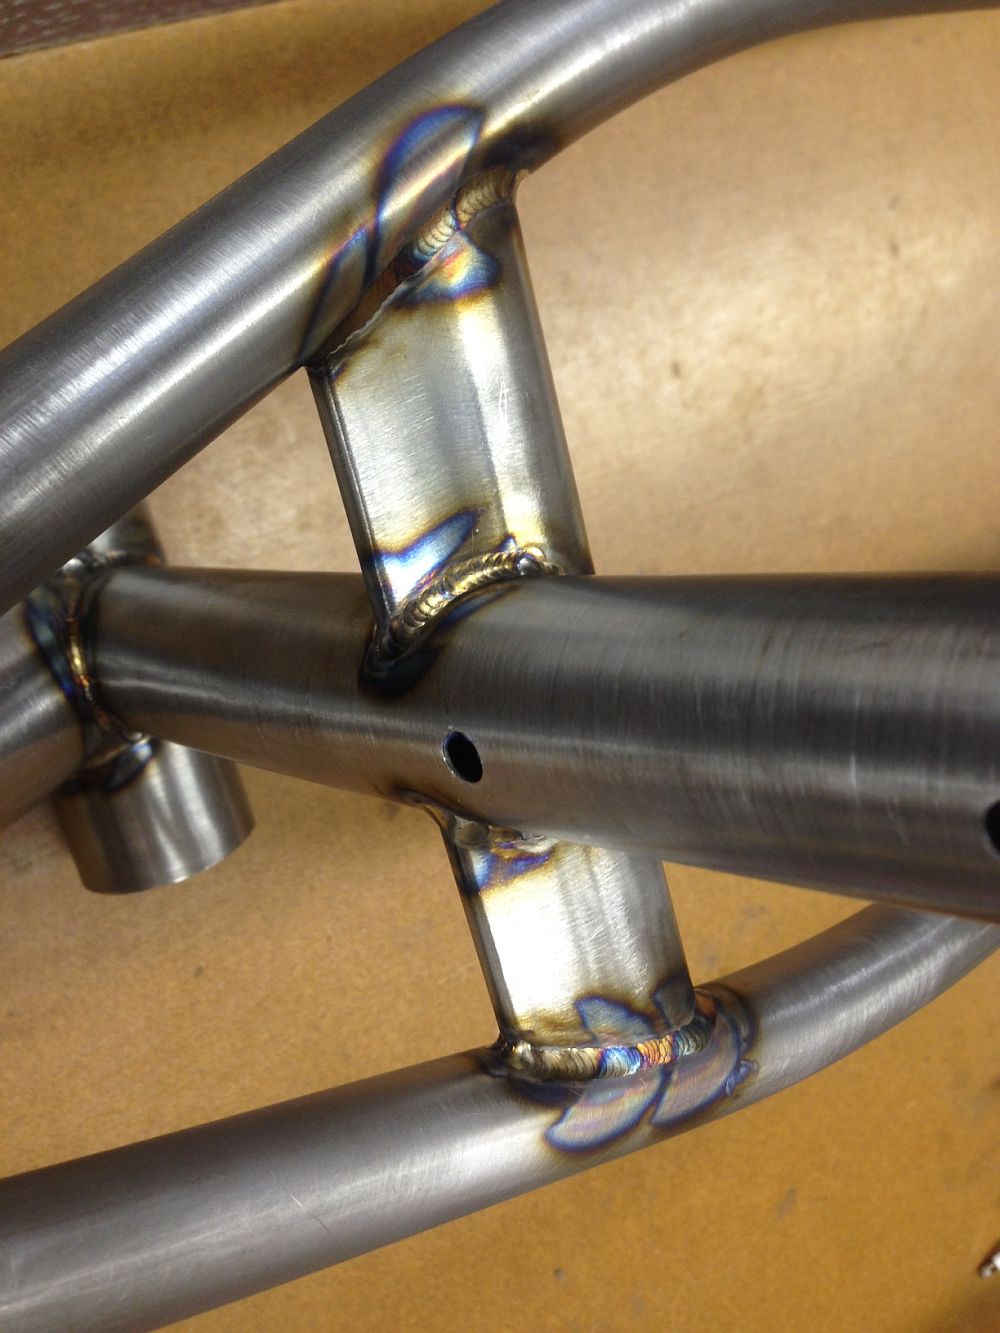
I didn’t take many pictures of the frame welds other than of the E-stay junction. I set the peak amps to 100, the ‘background current’ to 25 amps, the frequency at 1.7pps, and the pulse width at 45%. I used the foot pedal to regulate the amps based on the tube wall thickness instead of futzing with the pulser settings for each joint. I could weld the BB with a heatsink to the seat tube with these settings as well as the hooded dropouts to the stays. Unless I was going to be using something less than 0.7mm wall tubing, I may just stay with those pulser settings. I’m using the next frame, a new geared cross bike for me, for further experimentation with the pulser to get it dialed in before taking on friend’s bikes.

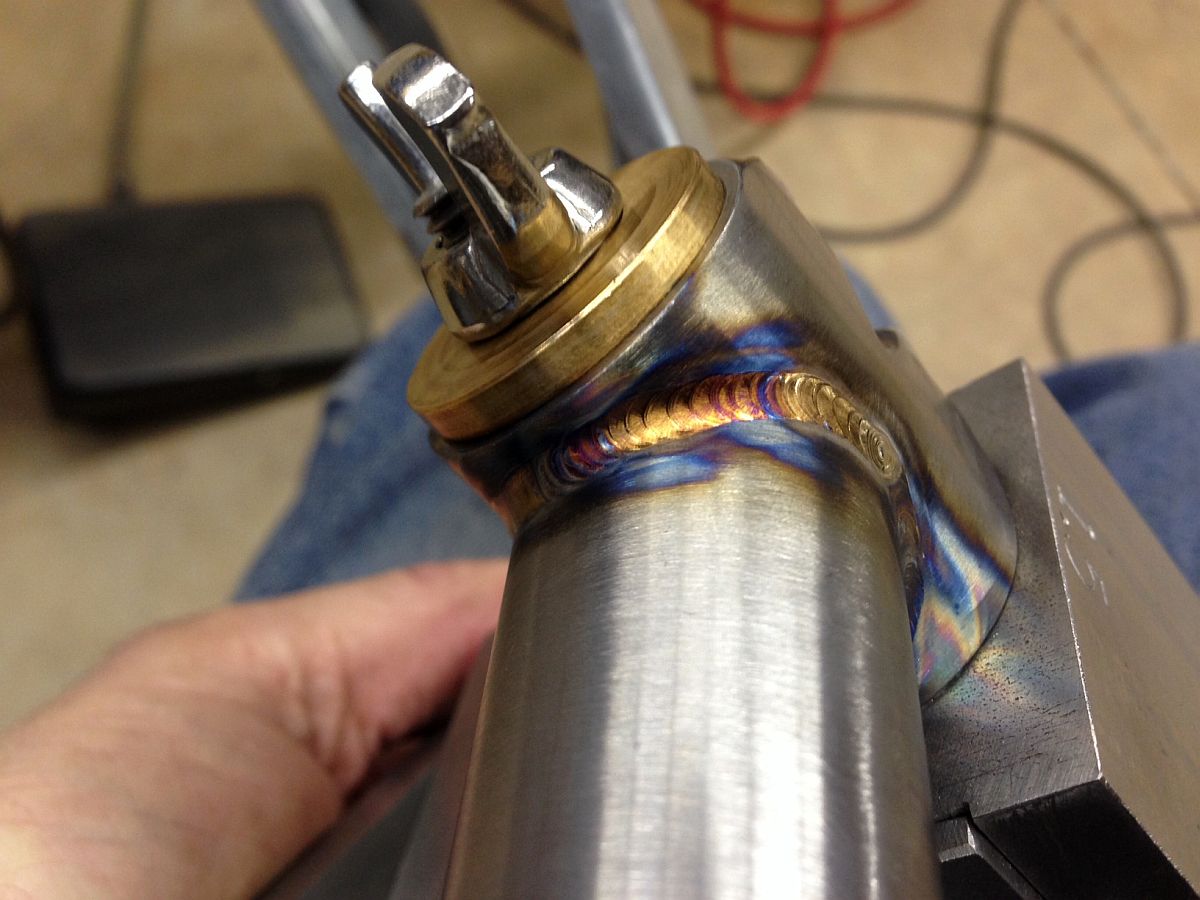
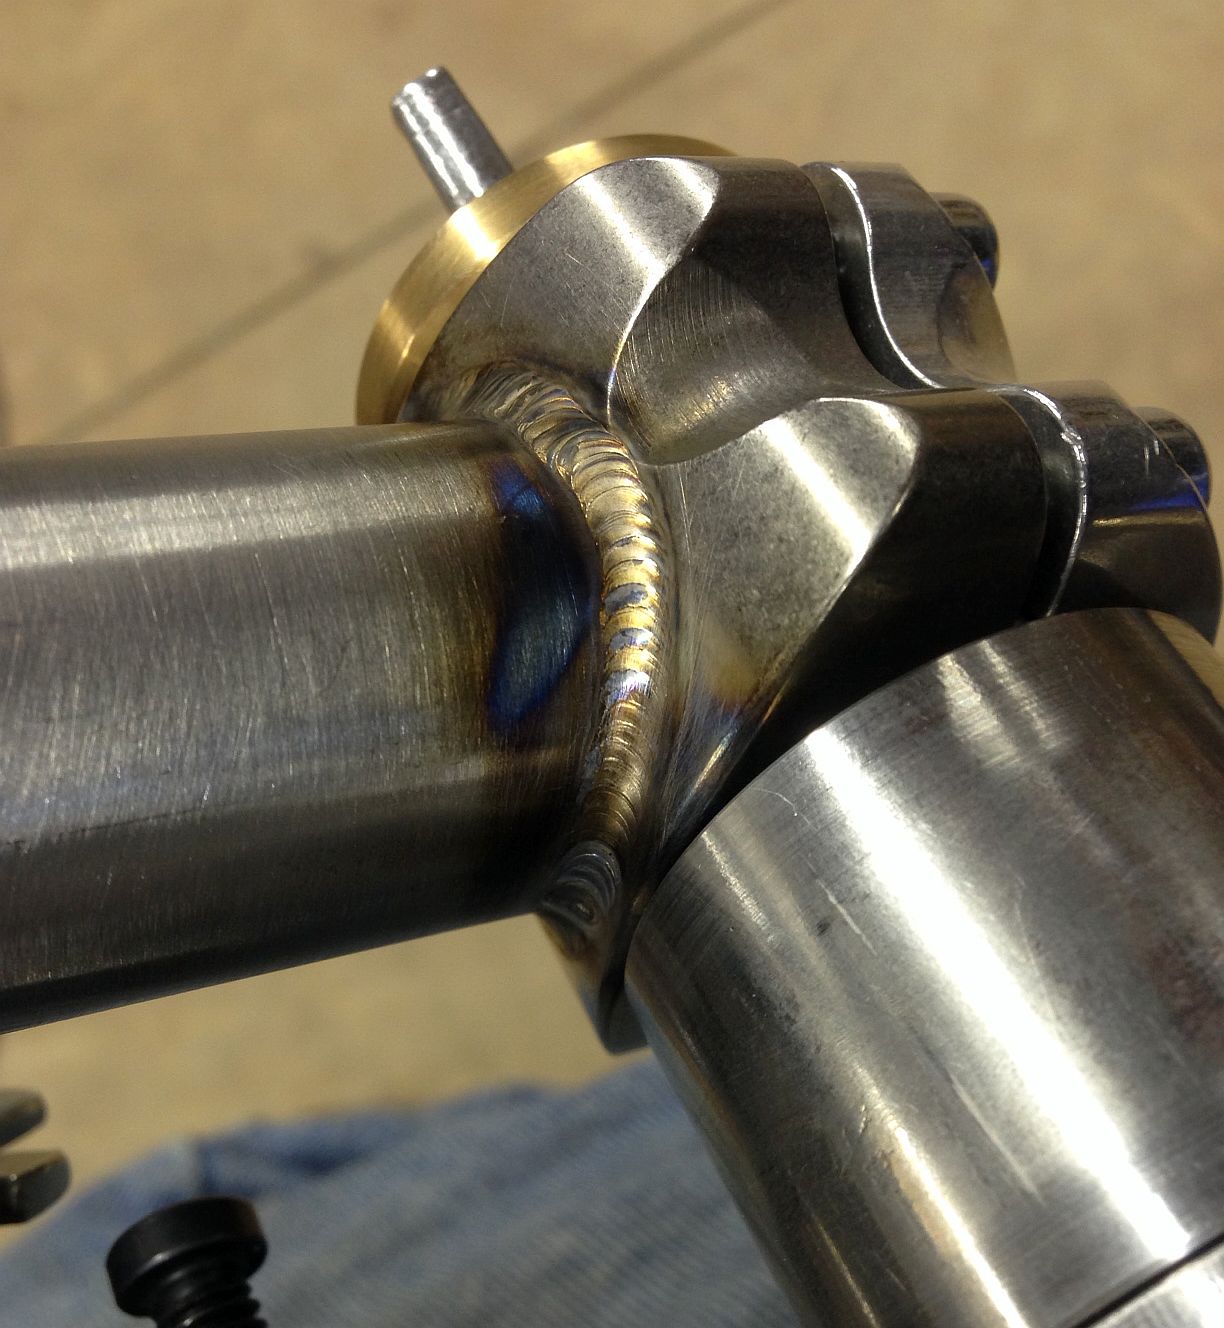
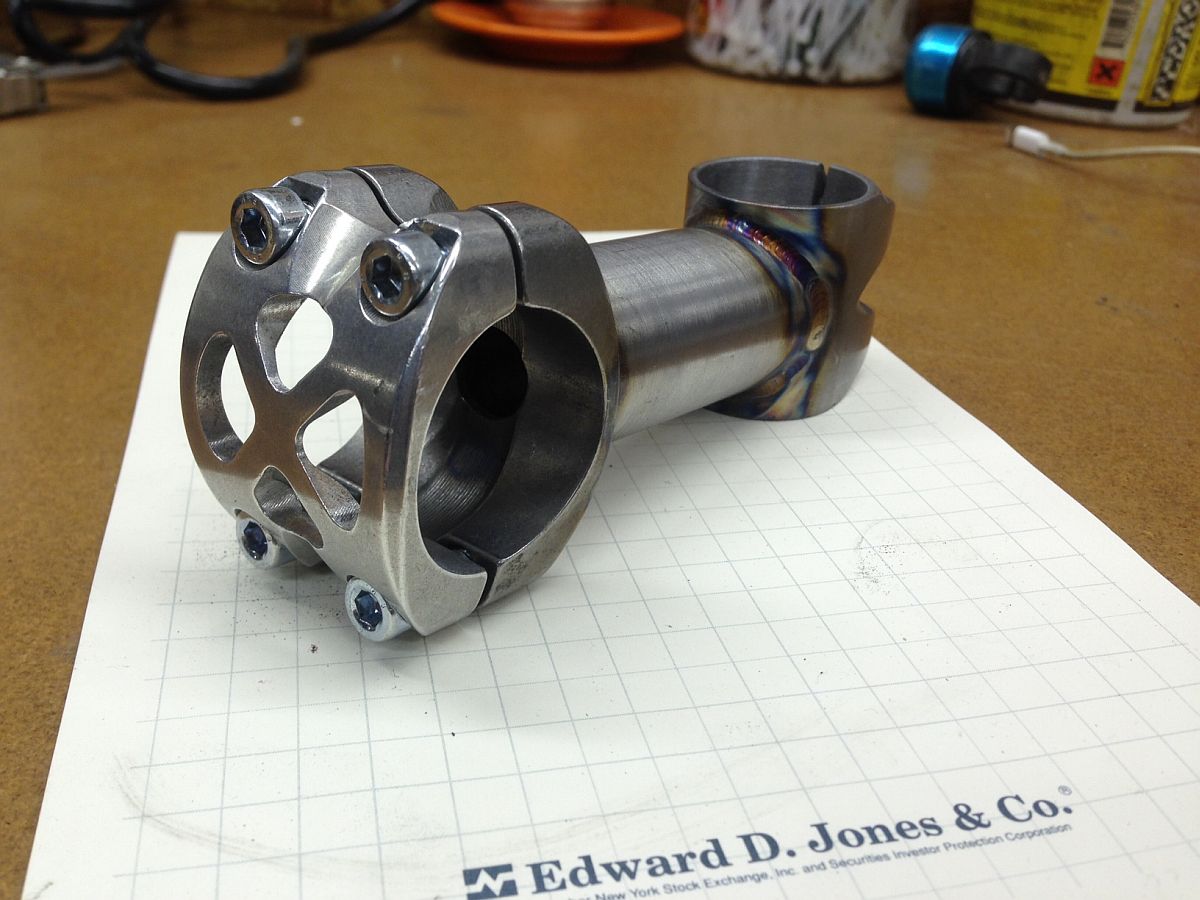
I also used the pulser on my first stem. The steerer clamp and bar clamp/front plate are Paragon’s sweet Machine Works. I just mitered the 1.125 x 0.049″ tube to make this a 90mm x 8 degree rise stem and welded if up in the fixture that has been too long a really expensive paperweight till now. These are so quick to make using the Paragon parts, but they are super expensive. Really no need to make stems, but it is a nice touch to a custom frame and pretty sweet looking in my opinion.
Interesting stuff Whit, and congratulations on the welding breakthrough.
Thanks Alistair! It’s funny because I feel like I’m starting over again in welding now that I’m using the pulser. It’s endless the tweaking one can make to the settings. I had just figured out the straight amp values I liked for each tube joint and now I go and change the whole process up.
For sure. The fact that pretty big improvements in results can come from relatively small changes in technique is fascinating to me. I think that’s why this stuff can be so difficult to describe with words. Ultimately, you can only get really good by doing. Having someone tell you what to do can only get you so far. This is what makes the breakthrough moments so sweet.
Looks boss! What’s the elevated CS bike for? We luvz teh weird!
Thanks man! Trying out the slack n short chainstay geometry on a fatbike that fits Lou 4.7’s on Clown Shoe rims, should be fun. Once back from paint I’ll post some pics. It’s a funny lookin bike…
What amps you running with those pulse settings?
It’s a whole new ballgame to figure them out:)
I use higher amps like 120-150 but cut the peak to 35% and the background to 15% at 1pps. And if I’m doing edge pieces, or something thin, take to pulses up to 30pps. These came from Carl Snarl from metalguru, cheers
Thanks Andy for the settings advice!
I’m having trouble comparing the units between people’s machines.
On my ThermalArc I have a “Peak Amps” setting which I set to 80-110 depending on the wall thickness. The next setting is the “Base/Background Current” which I set to 25amps. I believe this is the 15% your referring to on your machine? If so would that be 15% of 120-150amps and be 18-23amps. The next setting I have is the “Pulse Width” which “sets the percentage of time of the Pulse Frequency for Peak weld current when the PULSE is on.” I’m assuming this is your 35%? I have mine set at 45%.
The last setting other than the purge seconds is the “Pulse Frequency” which is pretty obvious and I set that at 1.7 for the above welds but have tried 1-3, never 30 though!
I’ll have to give those settings a try on my machine. A higher peak amps with a shorter % of time on the Peak current may help penetration and prevent burn through on thin stuff. The 15% is lower than my settings and makes sense to me to be so low on the cool part of the pulse. This will be a fun day in the shop!
Using the pulser was a game changer for me as well. I typically run my peak at 60% and my background at 20%. I use the pulser on every joint and love it. I’m also a “lay the filler” type. I don’t dab at all, I feel like my welds are way more consistent with that technique. Thanks for the post.
Thanks for the comment Collin. When you say 60% peak, what amps is that? I’m having trouble translating the different machine setting names. The laying of the filler rod for me made the biggest difference since you should never starve the puddle and undercut the joint. I like how it fills the gap in the slight miter gaps. I do experience some balling of the filler rod though and that is something I hope will stop happening with more practice.
Whit, I think the confusion comes from the way that people interchange amperage and time when talking about pulser settings. Different brands define the pulse parameters in different ways (as you’ve alluded to) so it can take a couple of seconds to tell which system you’re looking at.
Regarding high freq pulsing, I’ve seen some videos over at “Welding TIps and Tricks.com where this was used. Seems that some find that the puddle excitation that results from pulser frequency’s of 25Hz and above to be beneficial when welding thinwalled tubing.
Never tried it myself, my old welder won’t pulse that high. I think it’s a more recent feature of the more modern inverters. Your Thermal Arc unit can do it I think?
I did some practice welds today to get a better handle on the settings with some 0.6 to 1.25mm tubing to simulate a top tube/head tube joint. My ThermalArc can do 500pps but I didn’t try it out 🙂
I tried 30pps and it was mildly annoying. I’m sure with practice it would be fine but for now I like 2-3pps max and just moving the torch faster or lowering the peak amps for thin walled stuff.
Yeah that 30pps is just a problem solver trick. I use 1pps for everything except like filling up the end of a seat stay. That super low background helps me from blowing through, and use enough amps to get good penetration. It took a while for me to get used to the settings Carl at metalguru used. We used 150a for headtubes/bb and maybe 135 for the thin stuff! But limiting peak/background lets good penetration and still keeps it manageable. guru ca not carl metalguru.
Whit, I have a Miller Dynasty and for it the peak is actually the percent of time that it’s at the main amps you set. So it’s not actually going higher than your main amperage setting. The background percent is the percent of amps (not time) you are set to. So if your at 50amps and your background is 20%, your background is 10amps. I run at 1.2pps but I’m going to experiment more with a much higher PPS in some areas to see if I can tighten things up a bit (like the outside edge of a hooded dropout). I’ve tried PPS in the 30-50 range but the sound bothers me and it wasn’t a huge change to me. My Miller documentation states that anything over 100 PPS is considered high-speed pulse and will resort in a smaller bead and smaller HAZ. Might experiment with that too on some scraps.